如何使用 Gmail 的批量邮件发送功能?
市面上的批量邮件发送工具基本都是要钱的,而免费的谷歌邮箱插件(配合谷歌表单发送邮件的那种)上限大概也就 50 条左右。其实 Gmail API 官方给出的限额是一天 500 封,这对于一般人来说也够了。如果一个账号一天发的邮箱太多自然就会被风控,但是 50 封又太少,通过循环调用 Gmail API,我们就可以实现日均批量发送至高 500 封邮件的壮举。
开始折腾!
核心目标
批量自动化给目标地址 Gmail 发送邮件,并且还能够自定义发送的内容。
申请 Gmail API
毫无疑问,要想批量地发送 Gmail 邮件,你肯定得有一个谷歌账号。前往激活谷歌云,然后参考下图,申请开启 Gmail API。我这里已经申请好了,所以显示的是“管理”,没申请好的账户会提示为“启用”。
赋予开发者应用权限
光获取 API Key 还不够,受制于谷歌的数据安全策略,要想愉快调用 API,需要开发者创建好 API 秘钥、申请 OAuth 2.0 客户端以及配置“同意屏幕”。
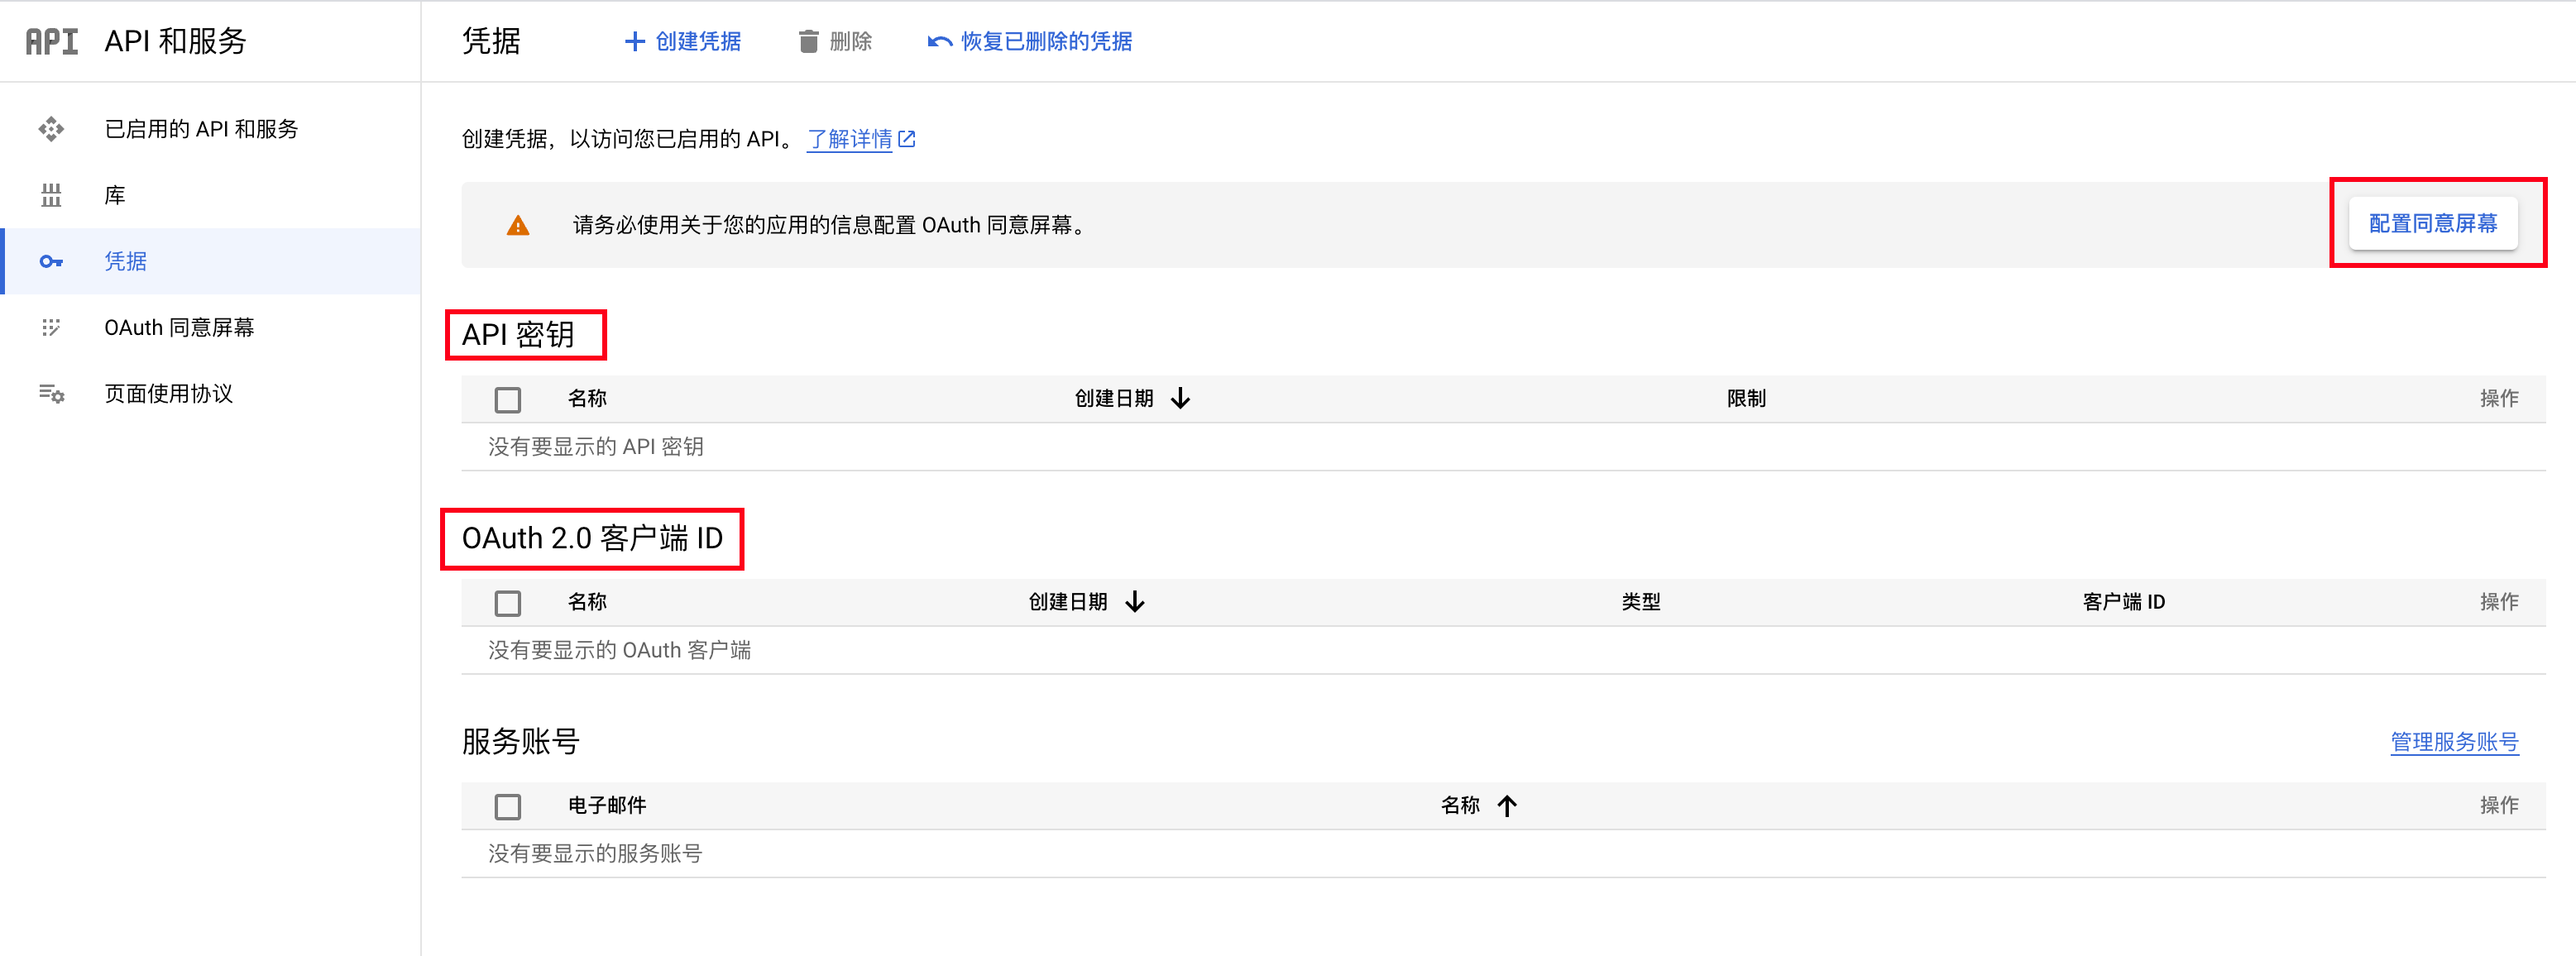
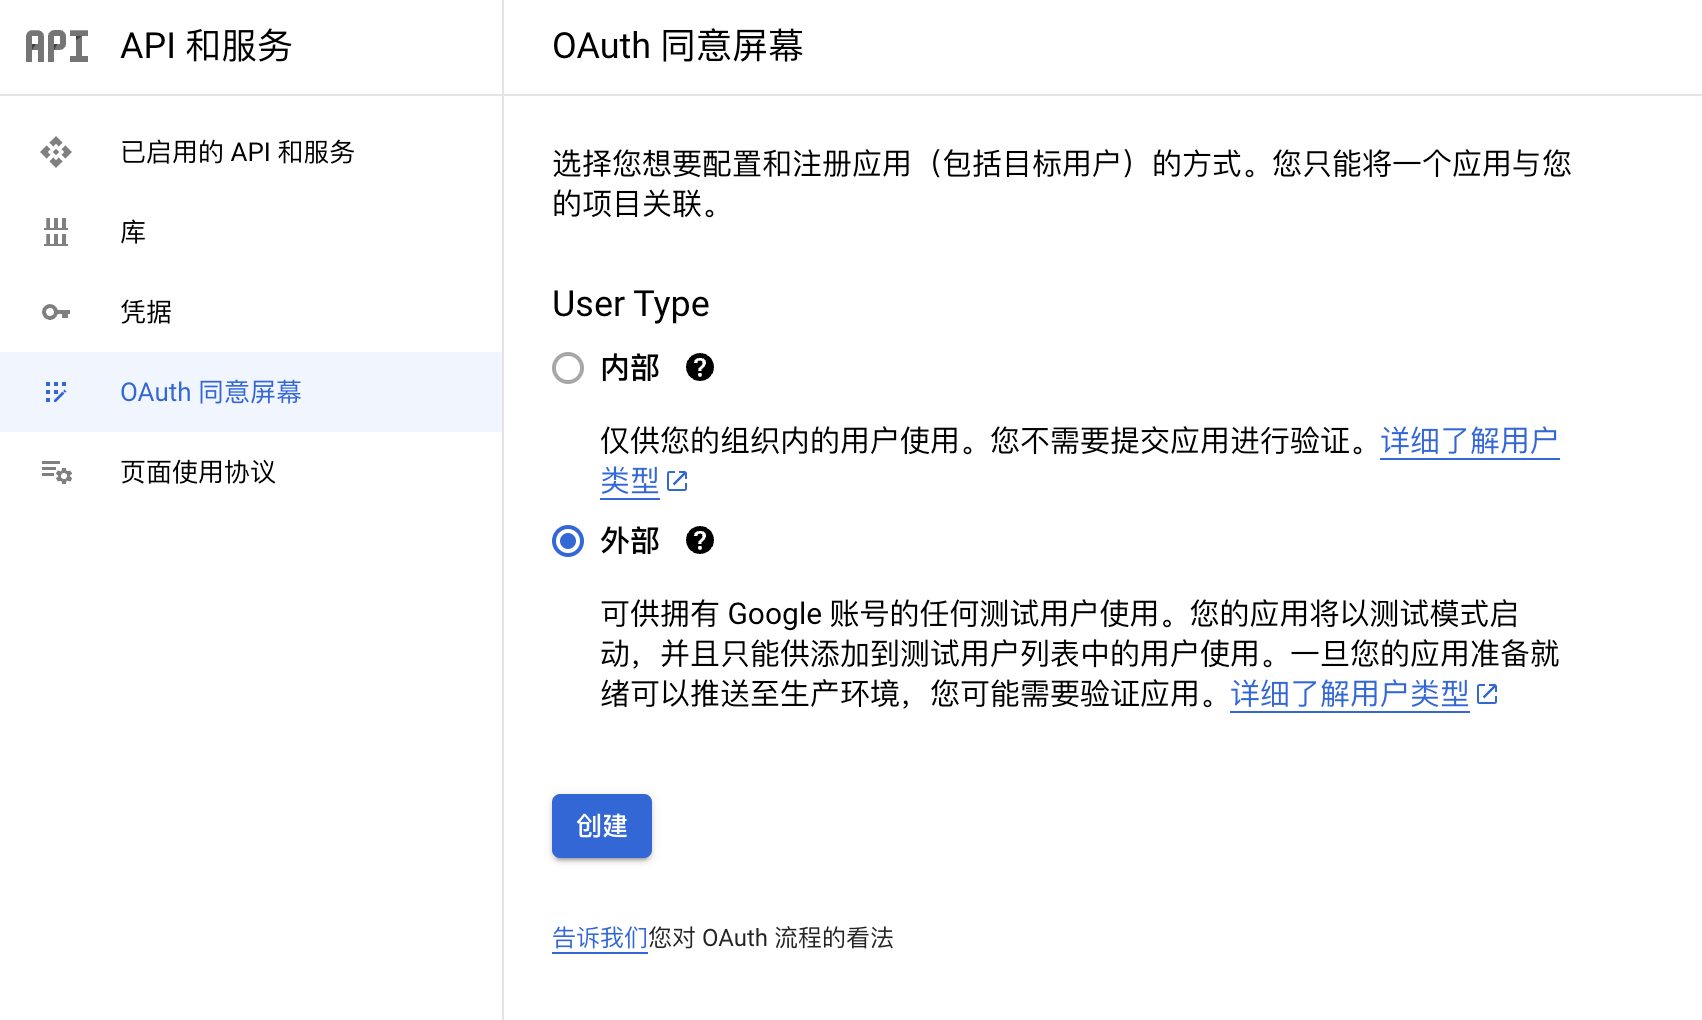
配置同意屏幕
我们先从最简单的配置同意屏幕开始,这里选“外部”。
按照提示填写要求的必填内容,最后点击“保存并继续”。
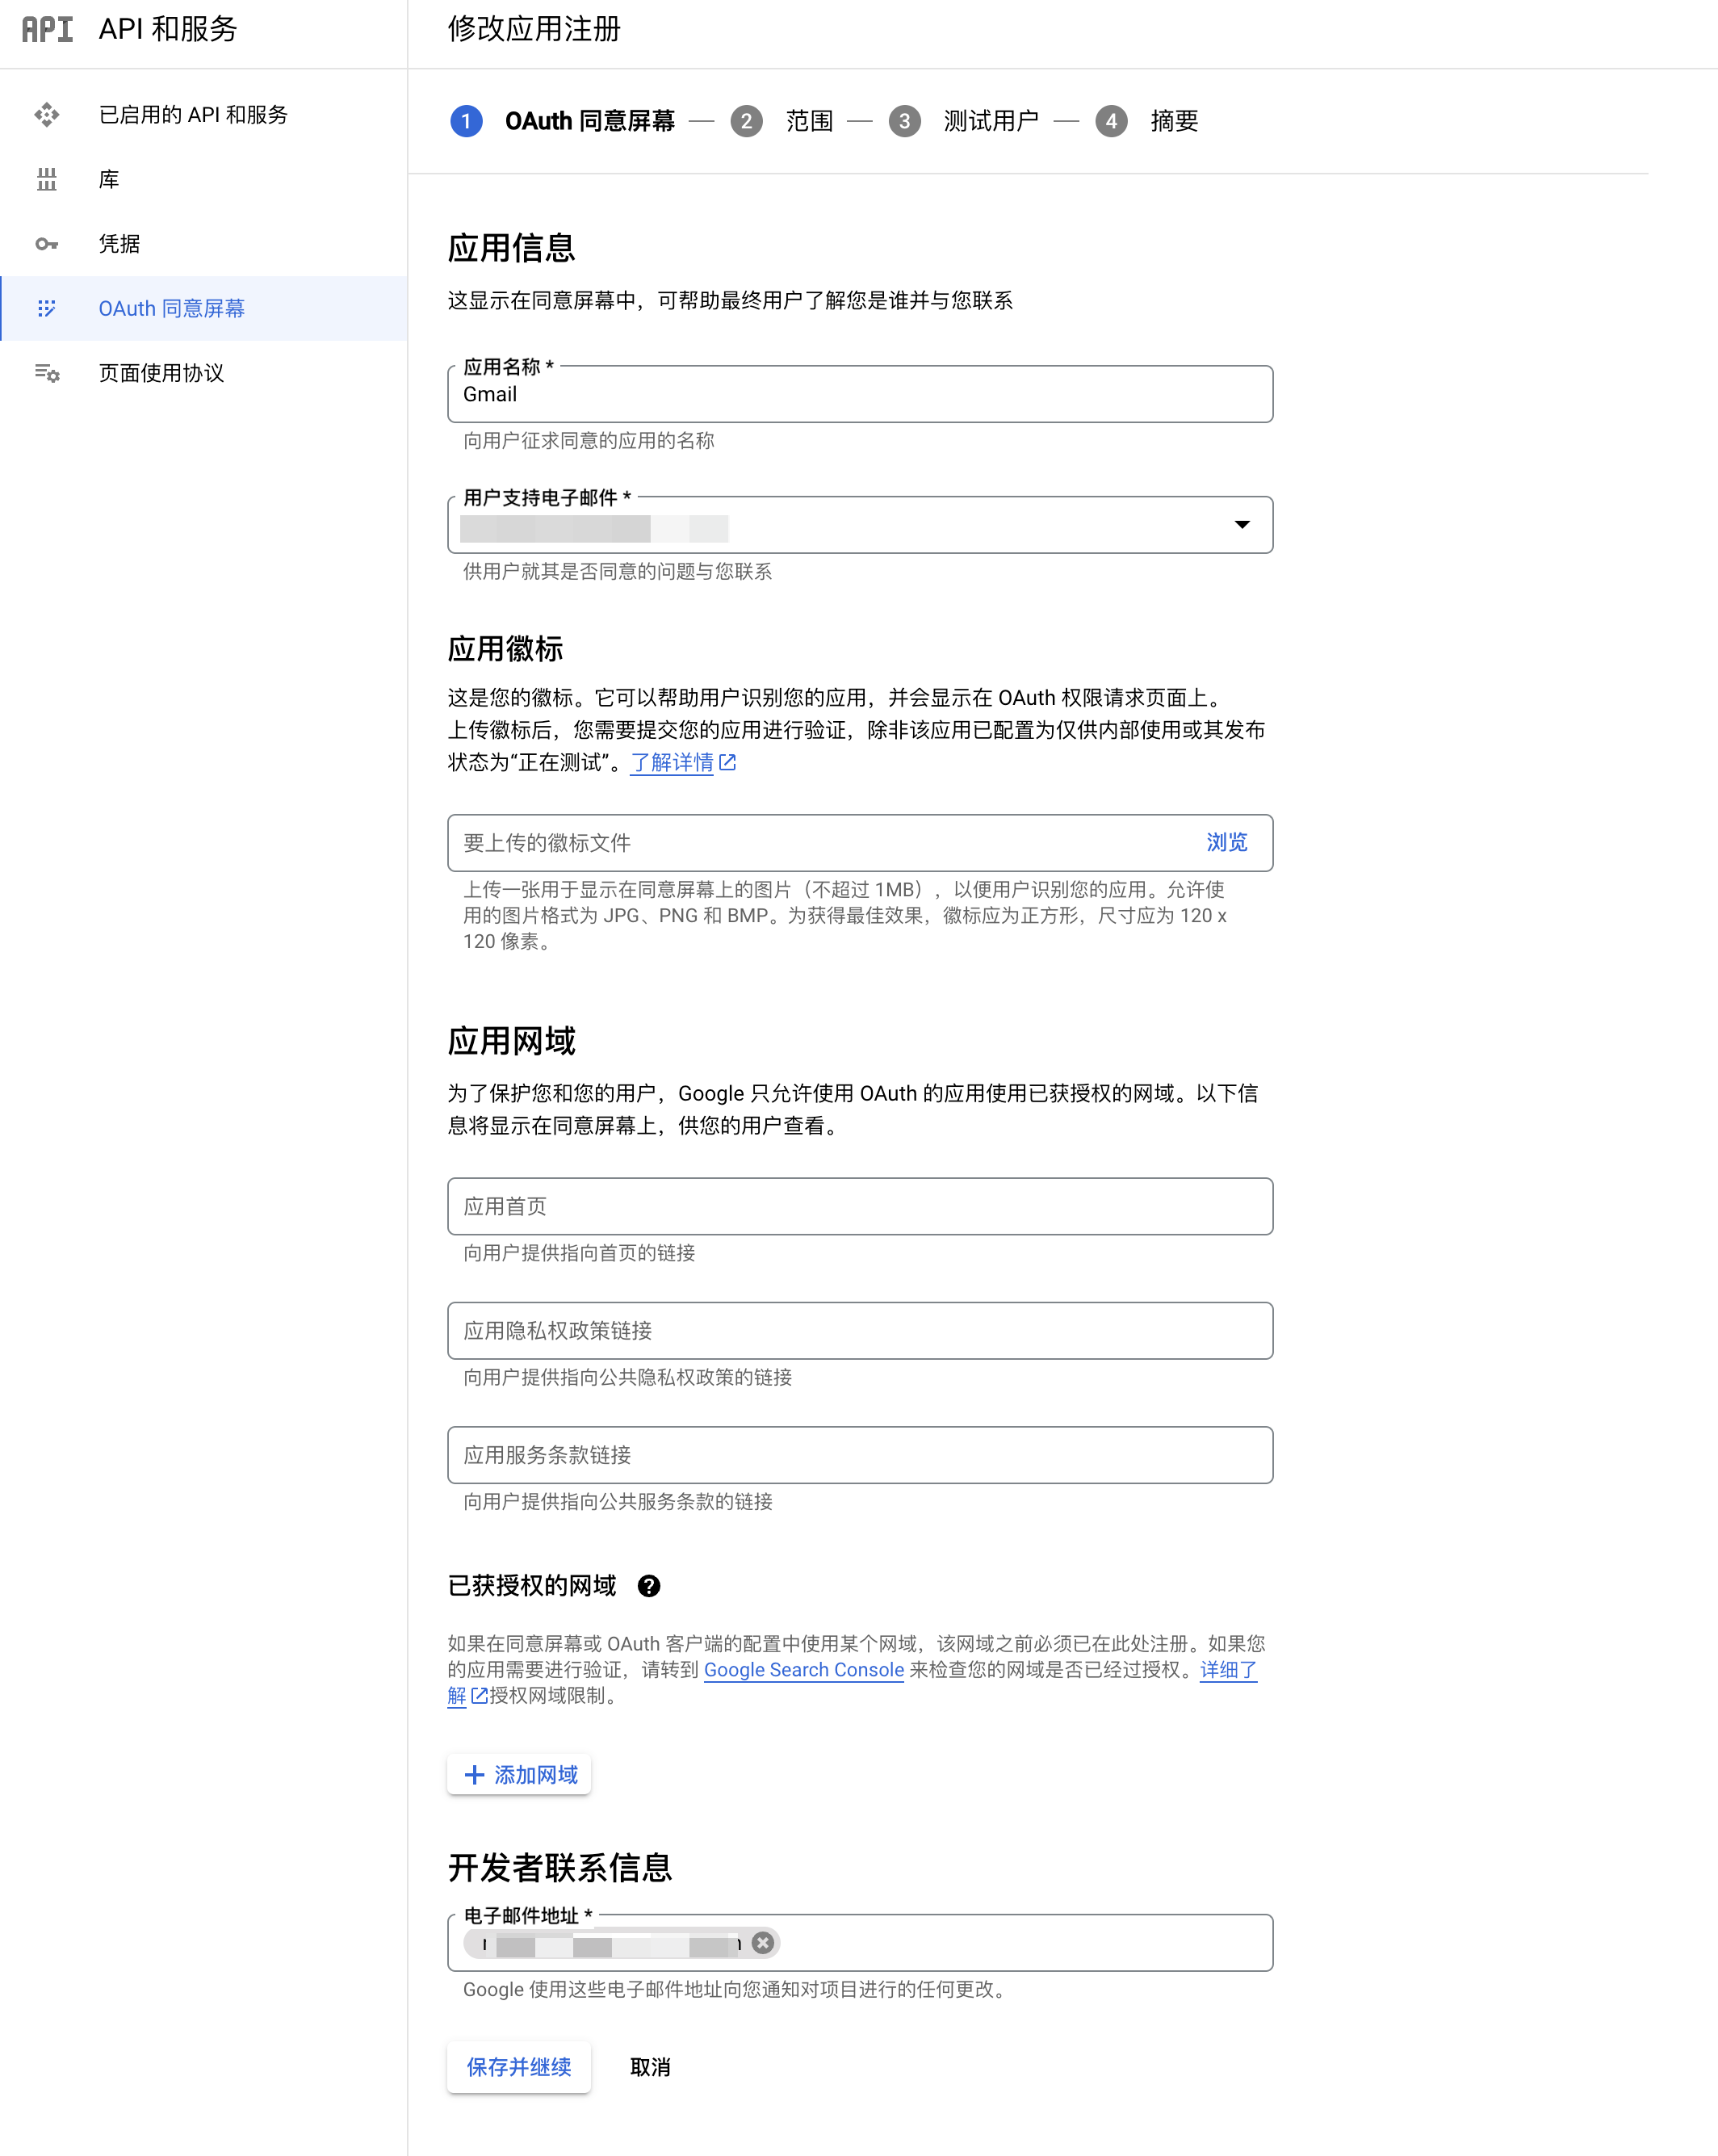
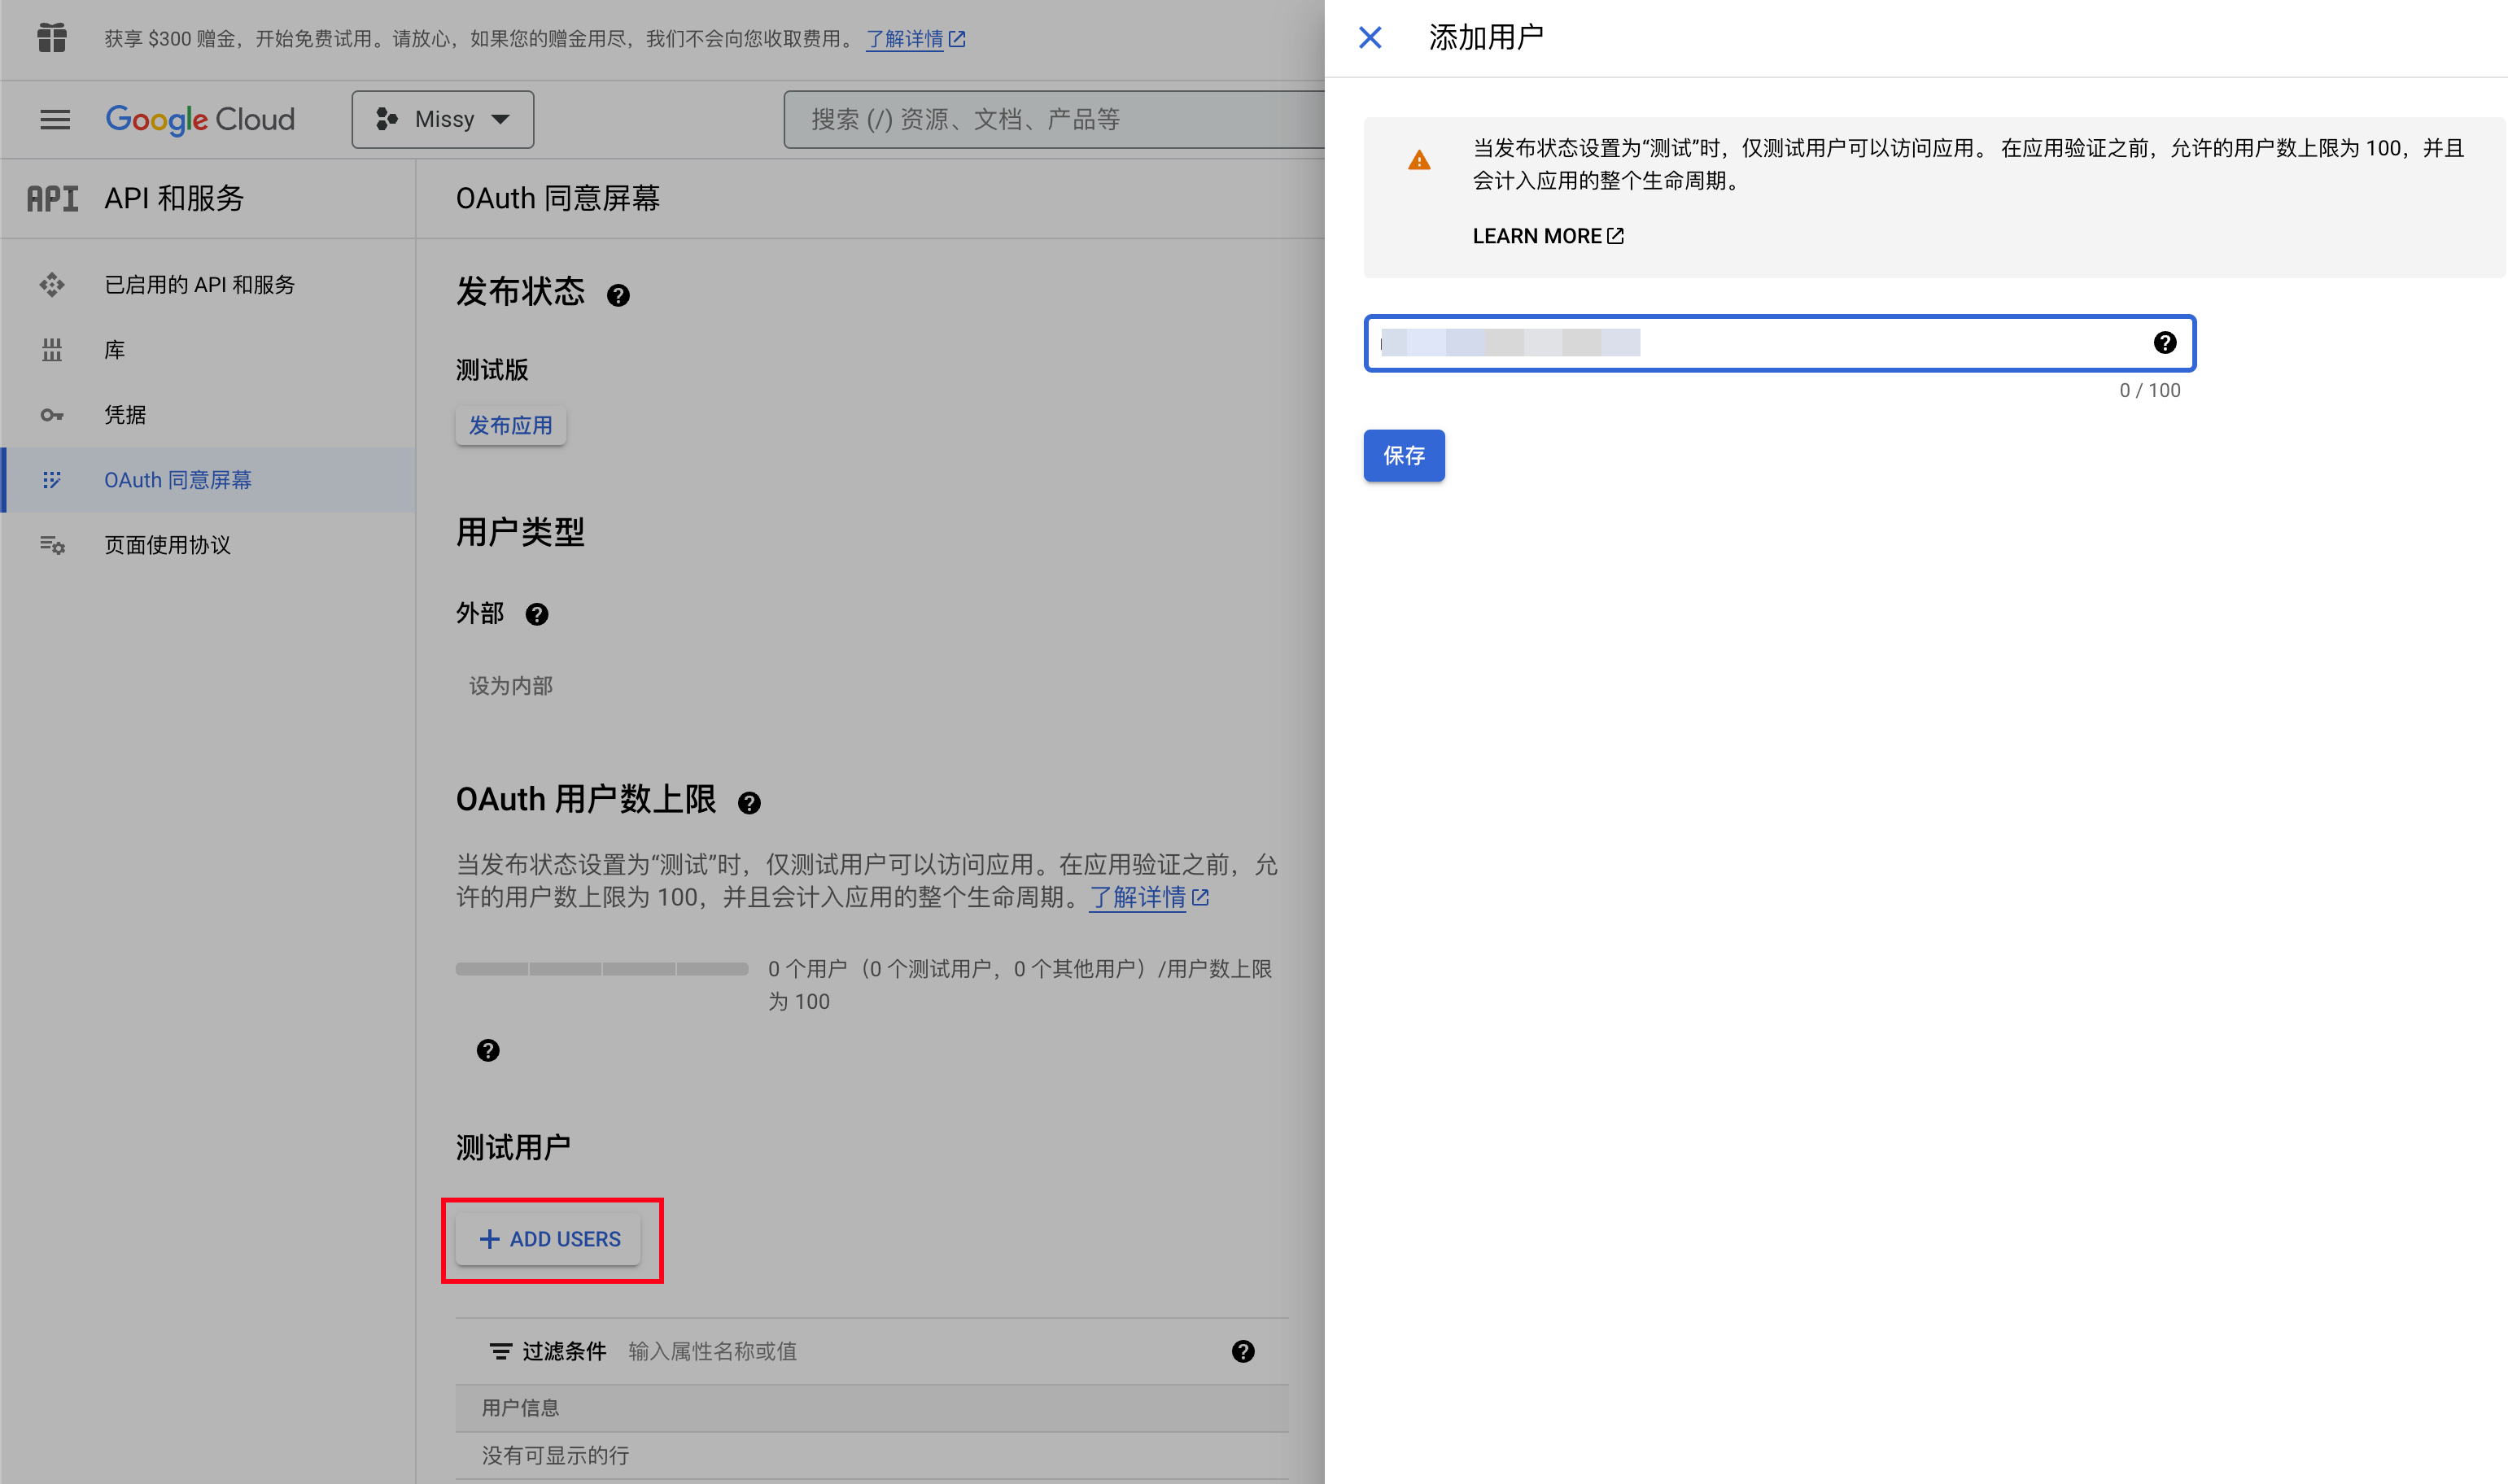
把自己加到这个应用的测试用户中。
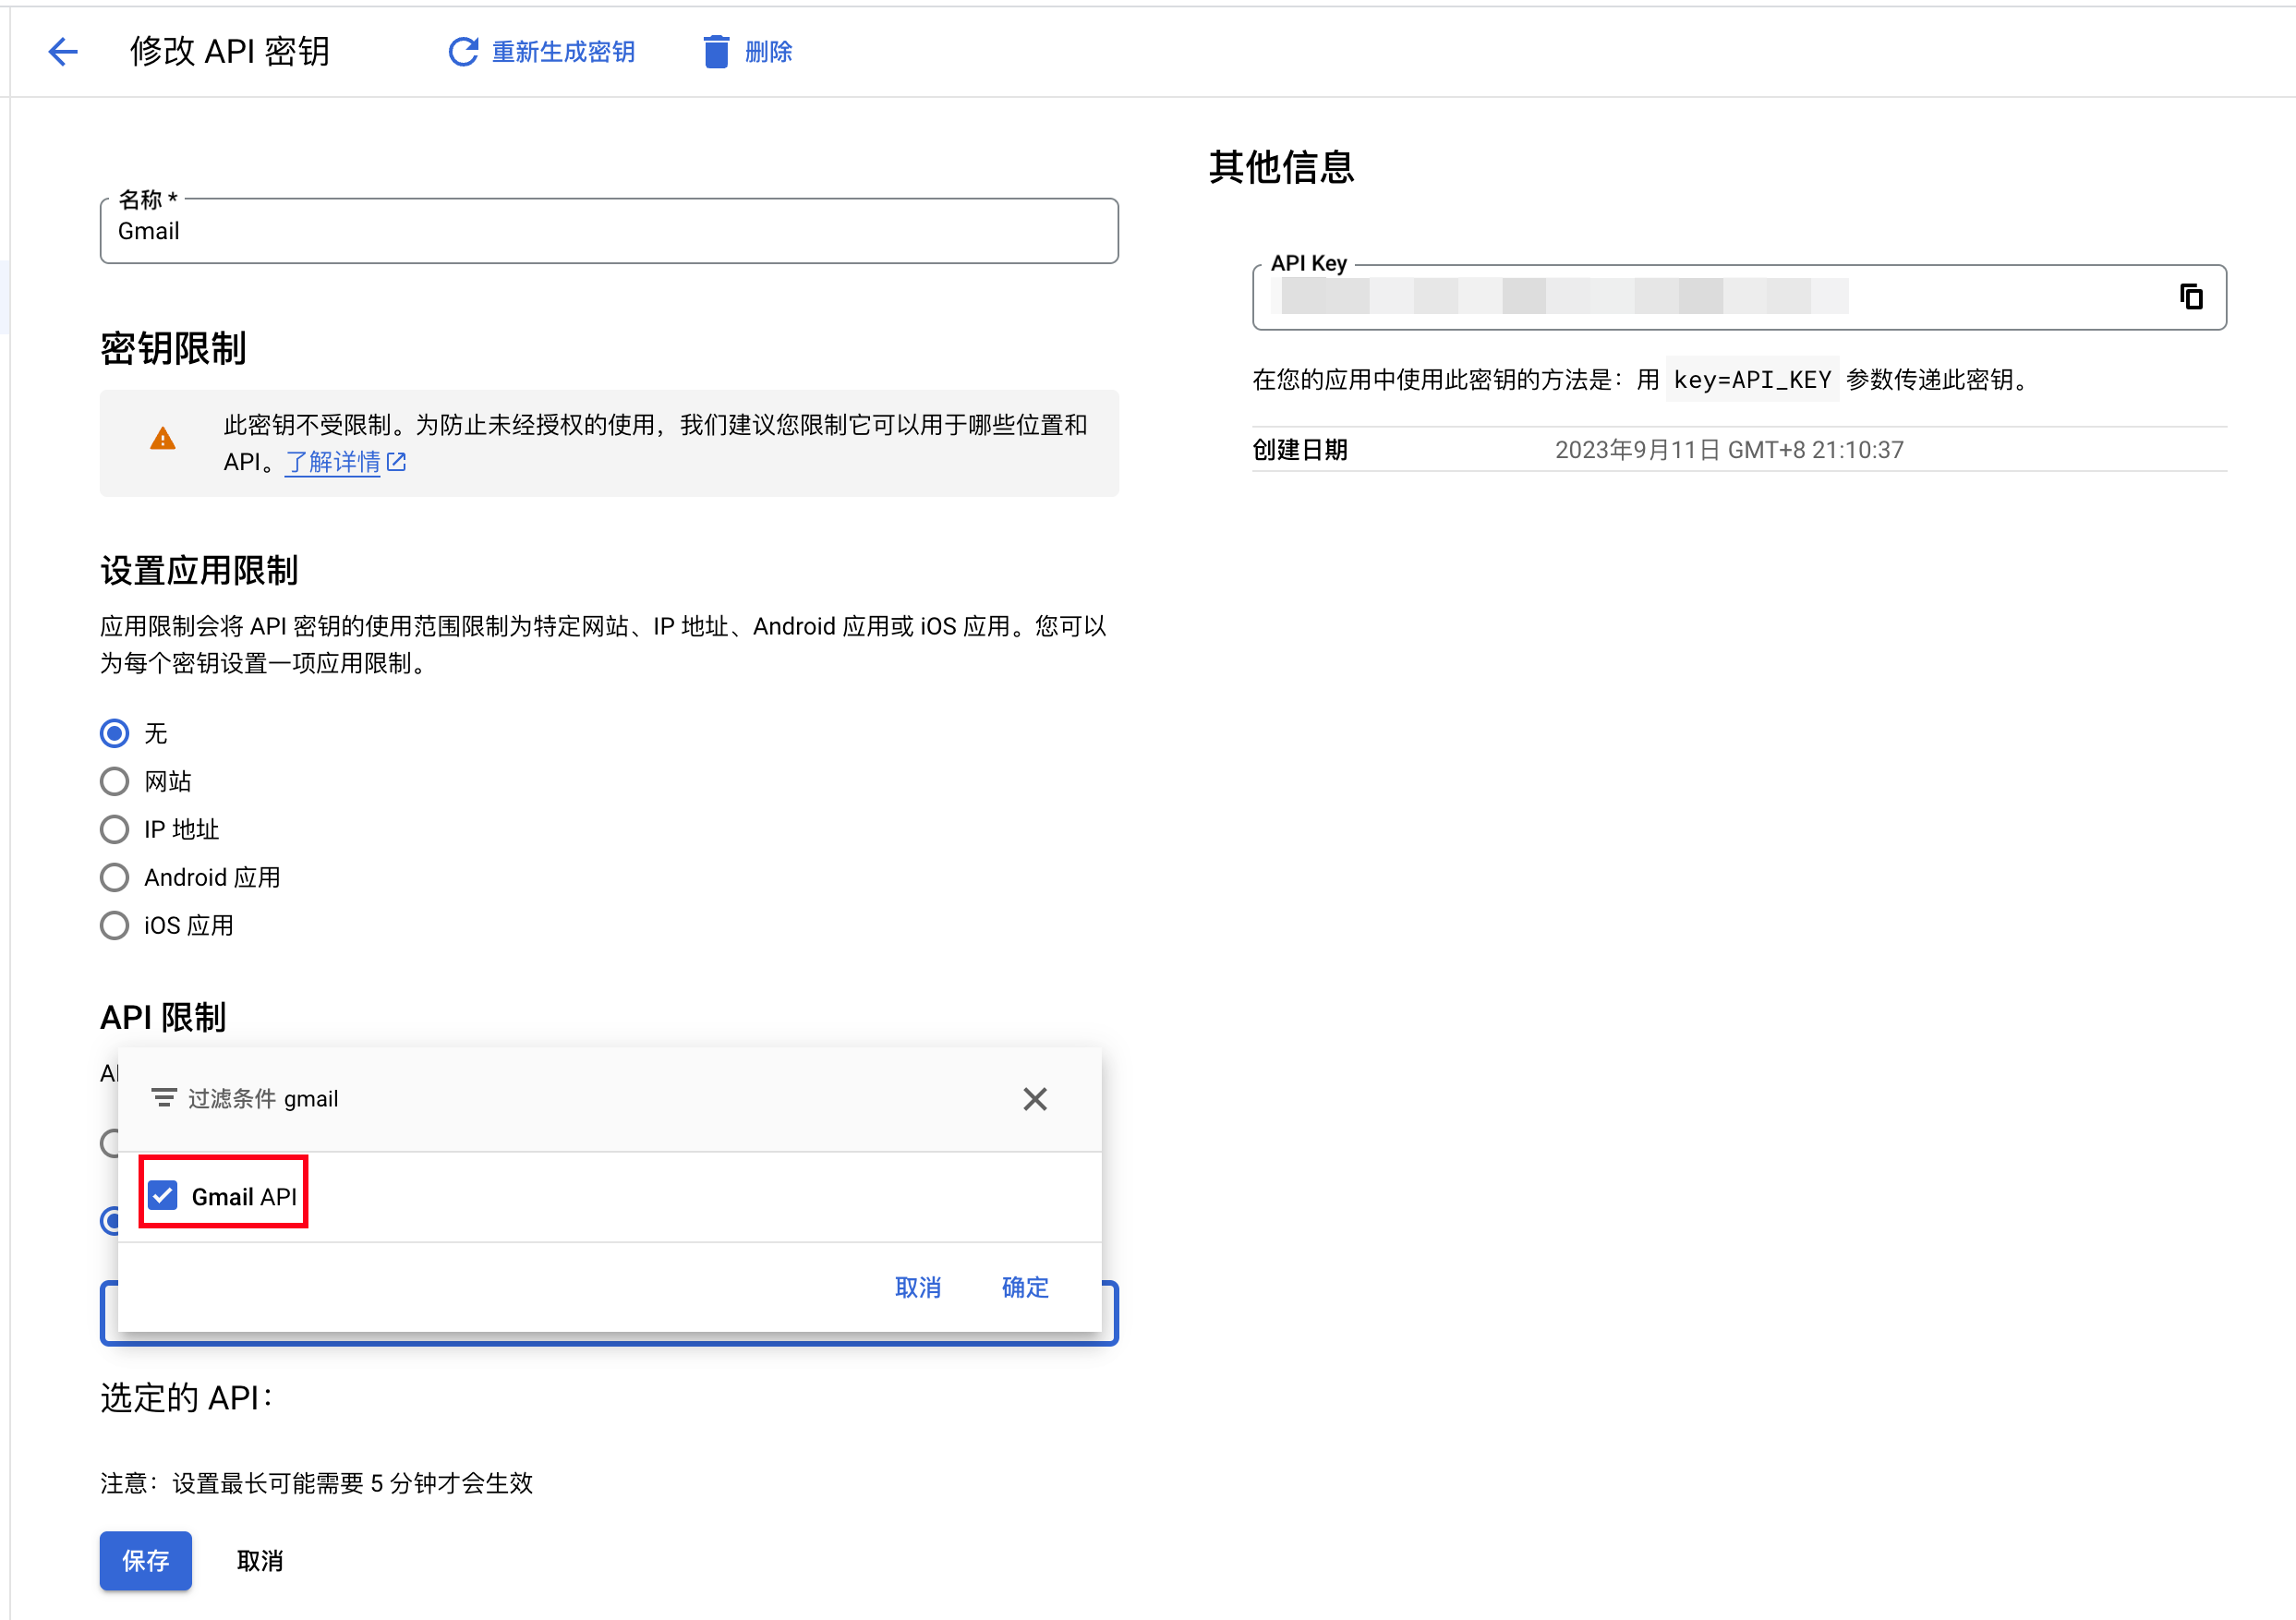
创建 API 秘钥
点击页面上的创建 “API 秘钥”。
然后牢记你的 API Key,同时建议缩小这个 Key 的功能适用范围,避免被滥用。比如说只用于 Gmail API 的调用。
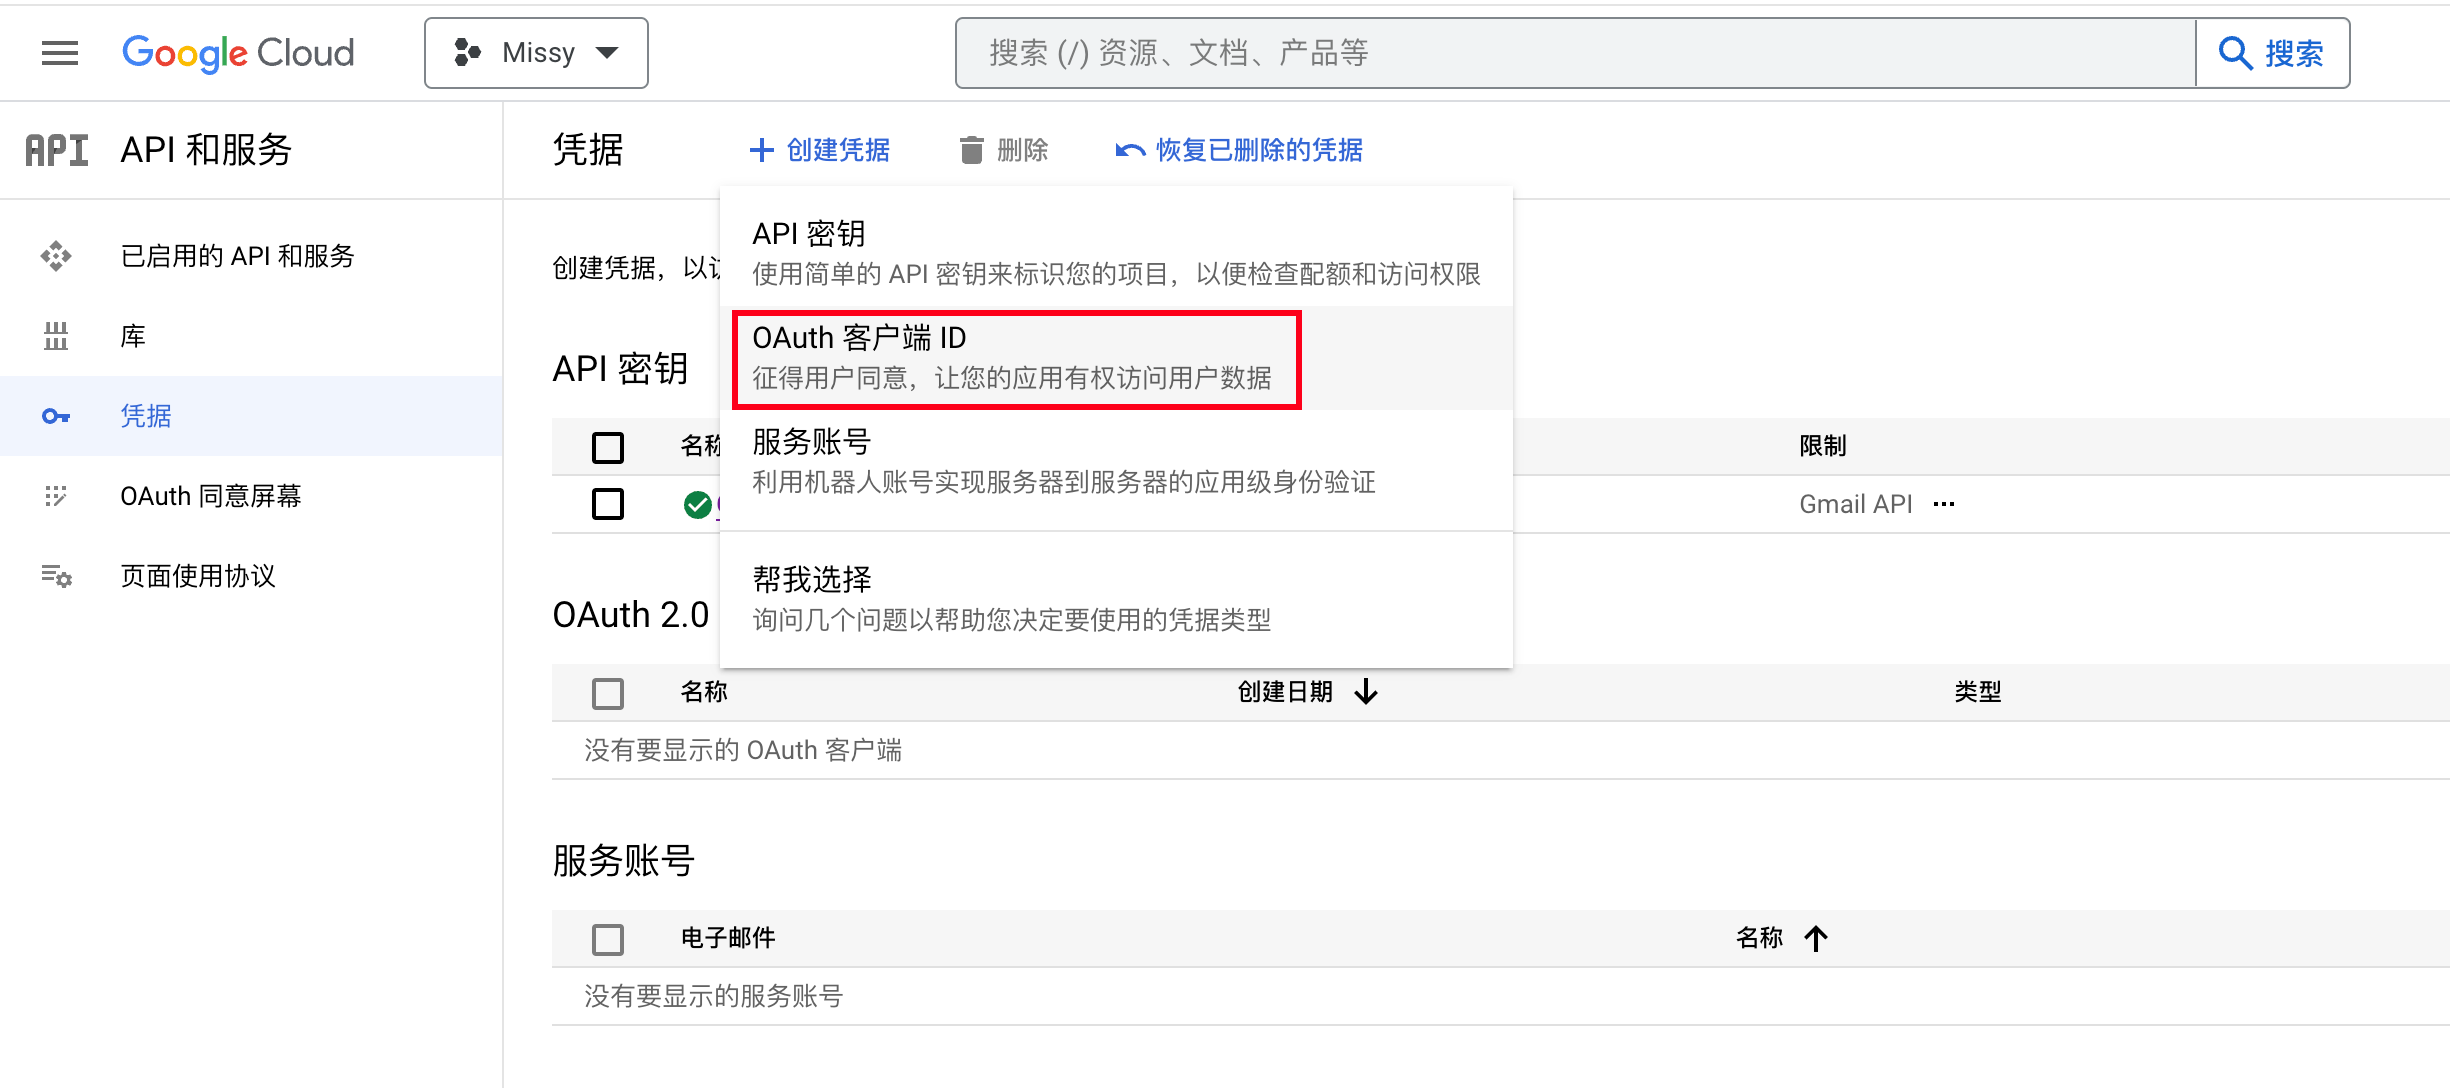
创建 OAuth 客户端 ID
点击页面上的创建 “OAuth 客户端 ID”。
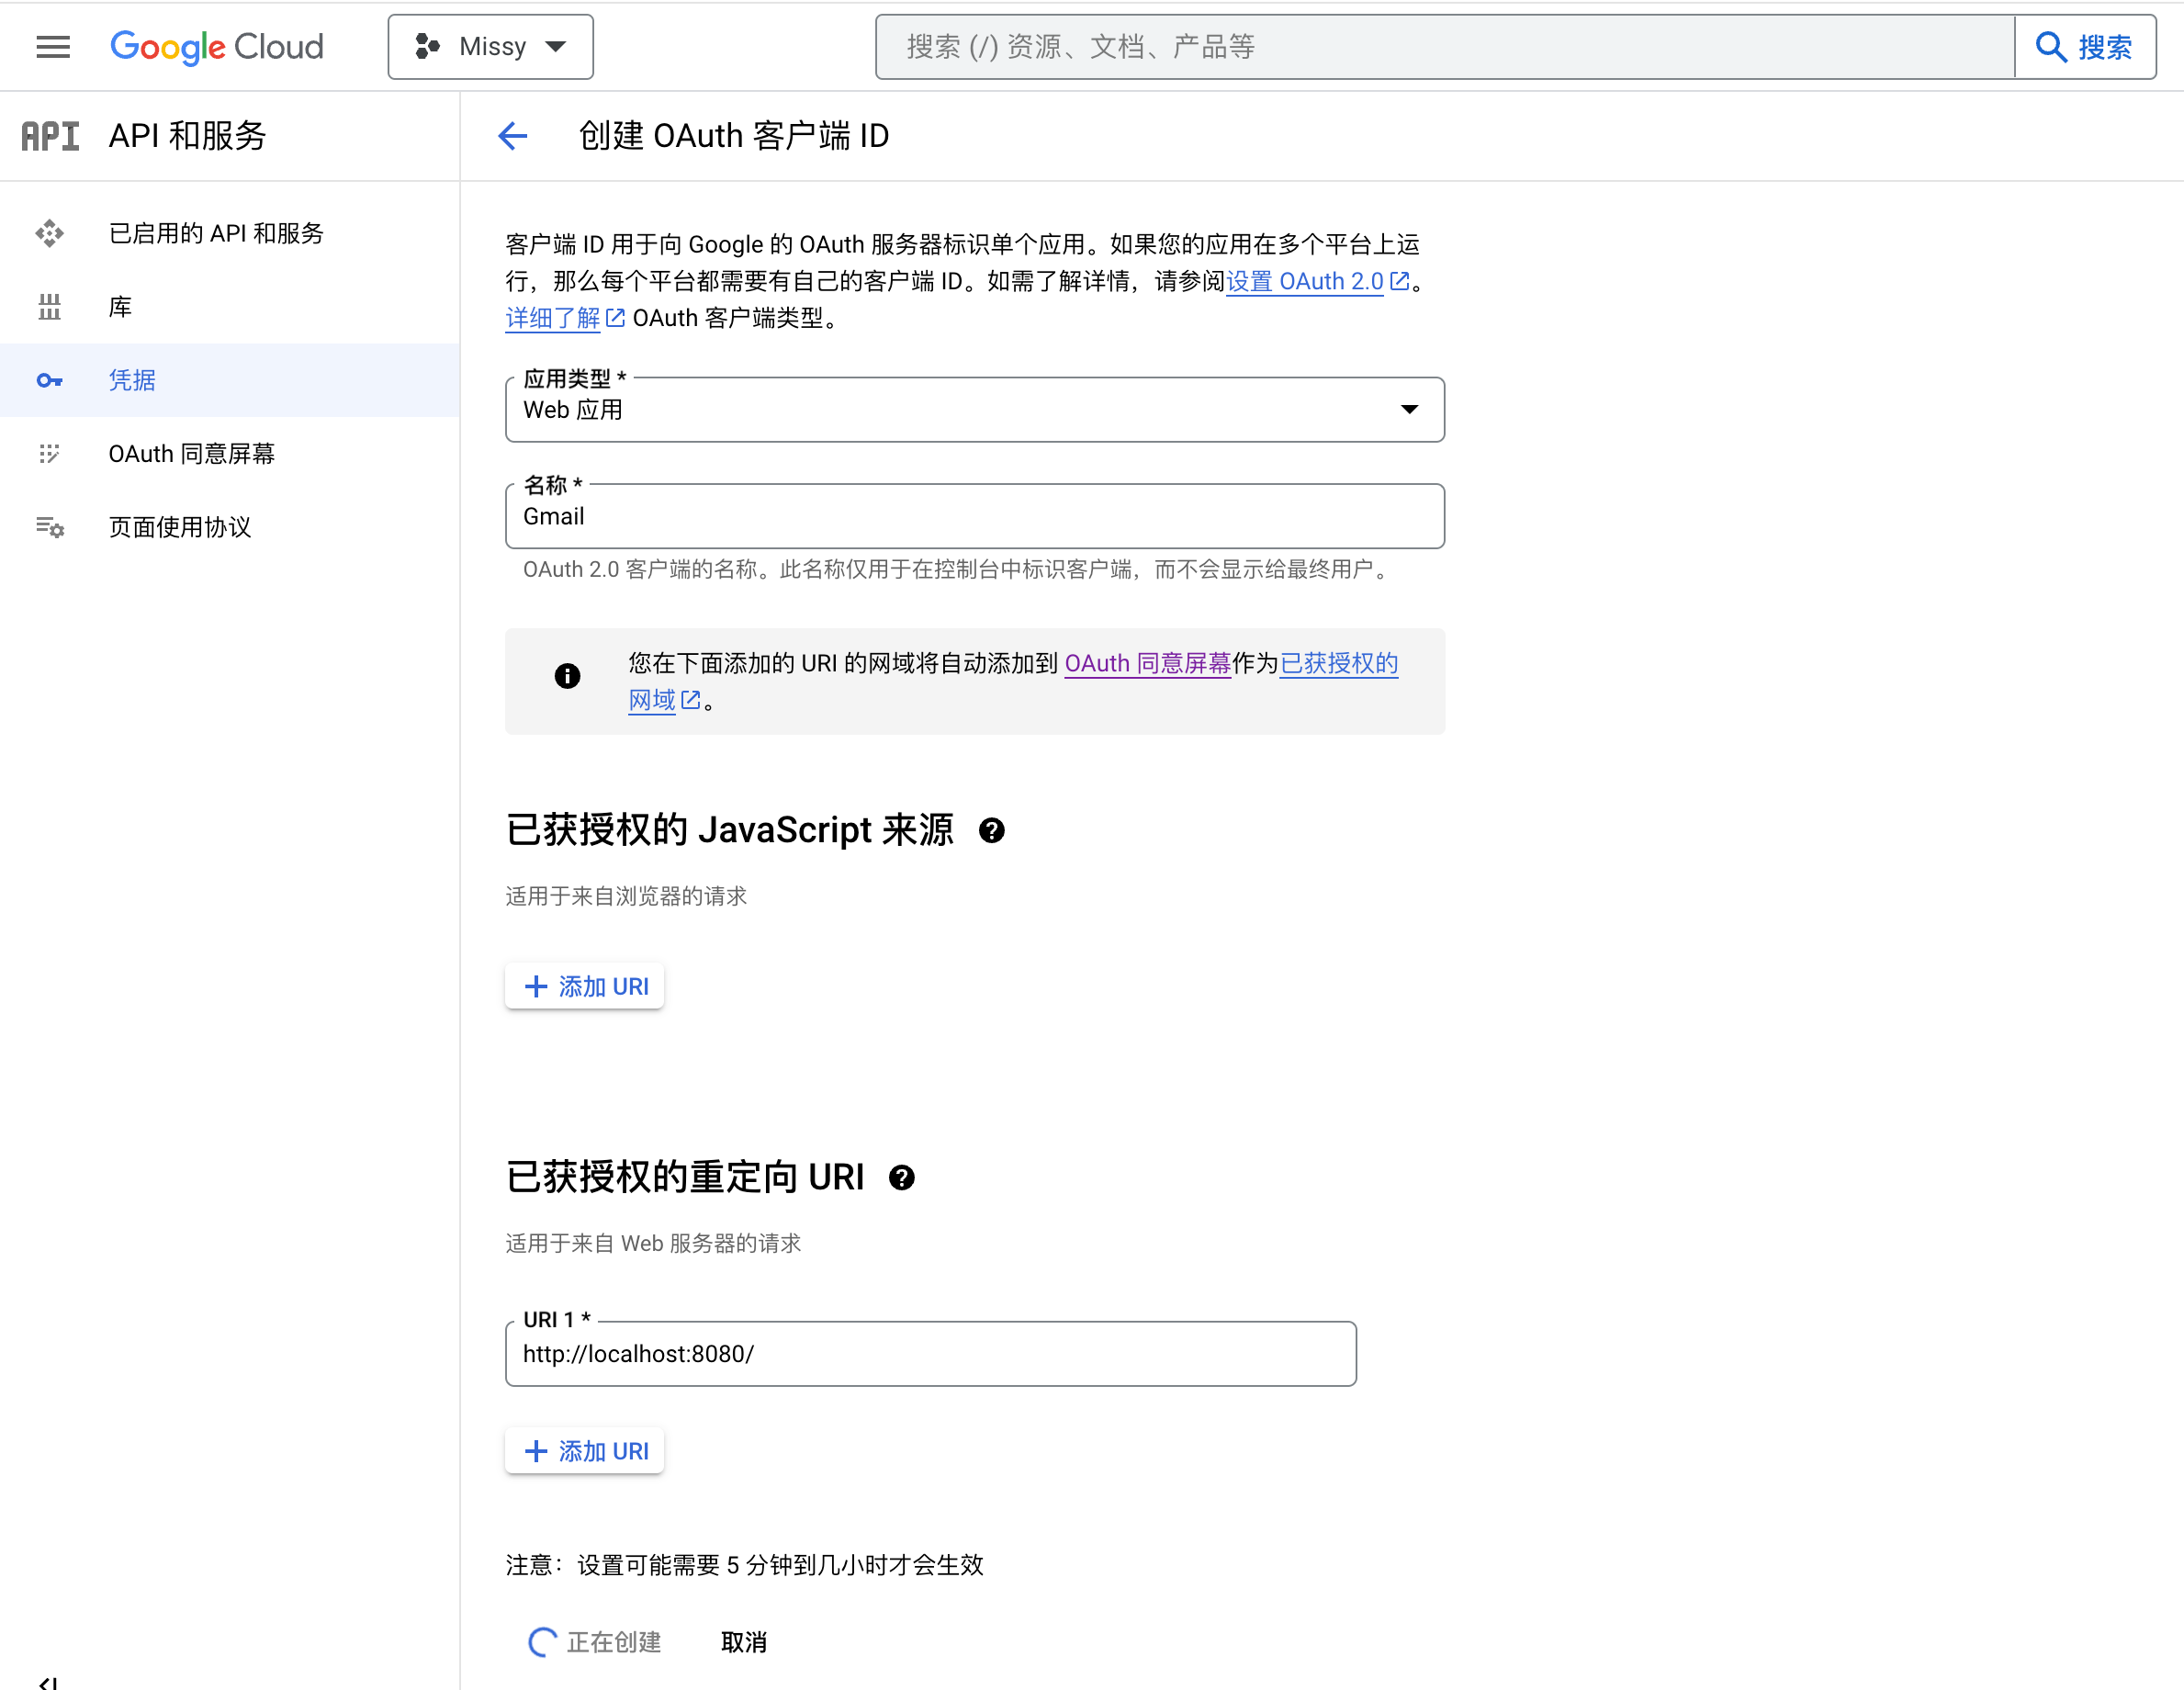
引用类型选择 Web 应用即可。已获授权重定向 URL 填写为 http://localhost:8080/
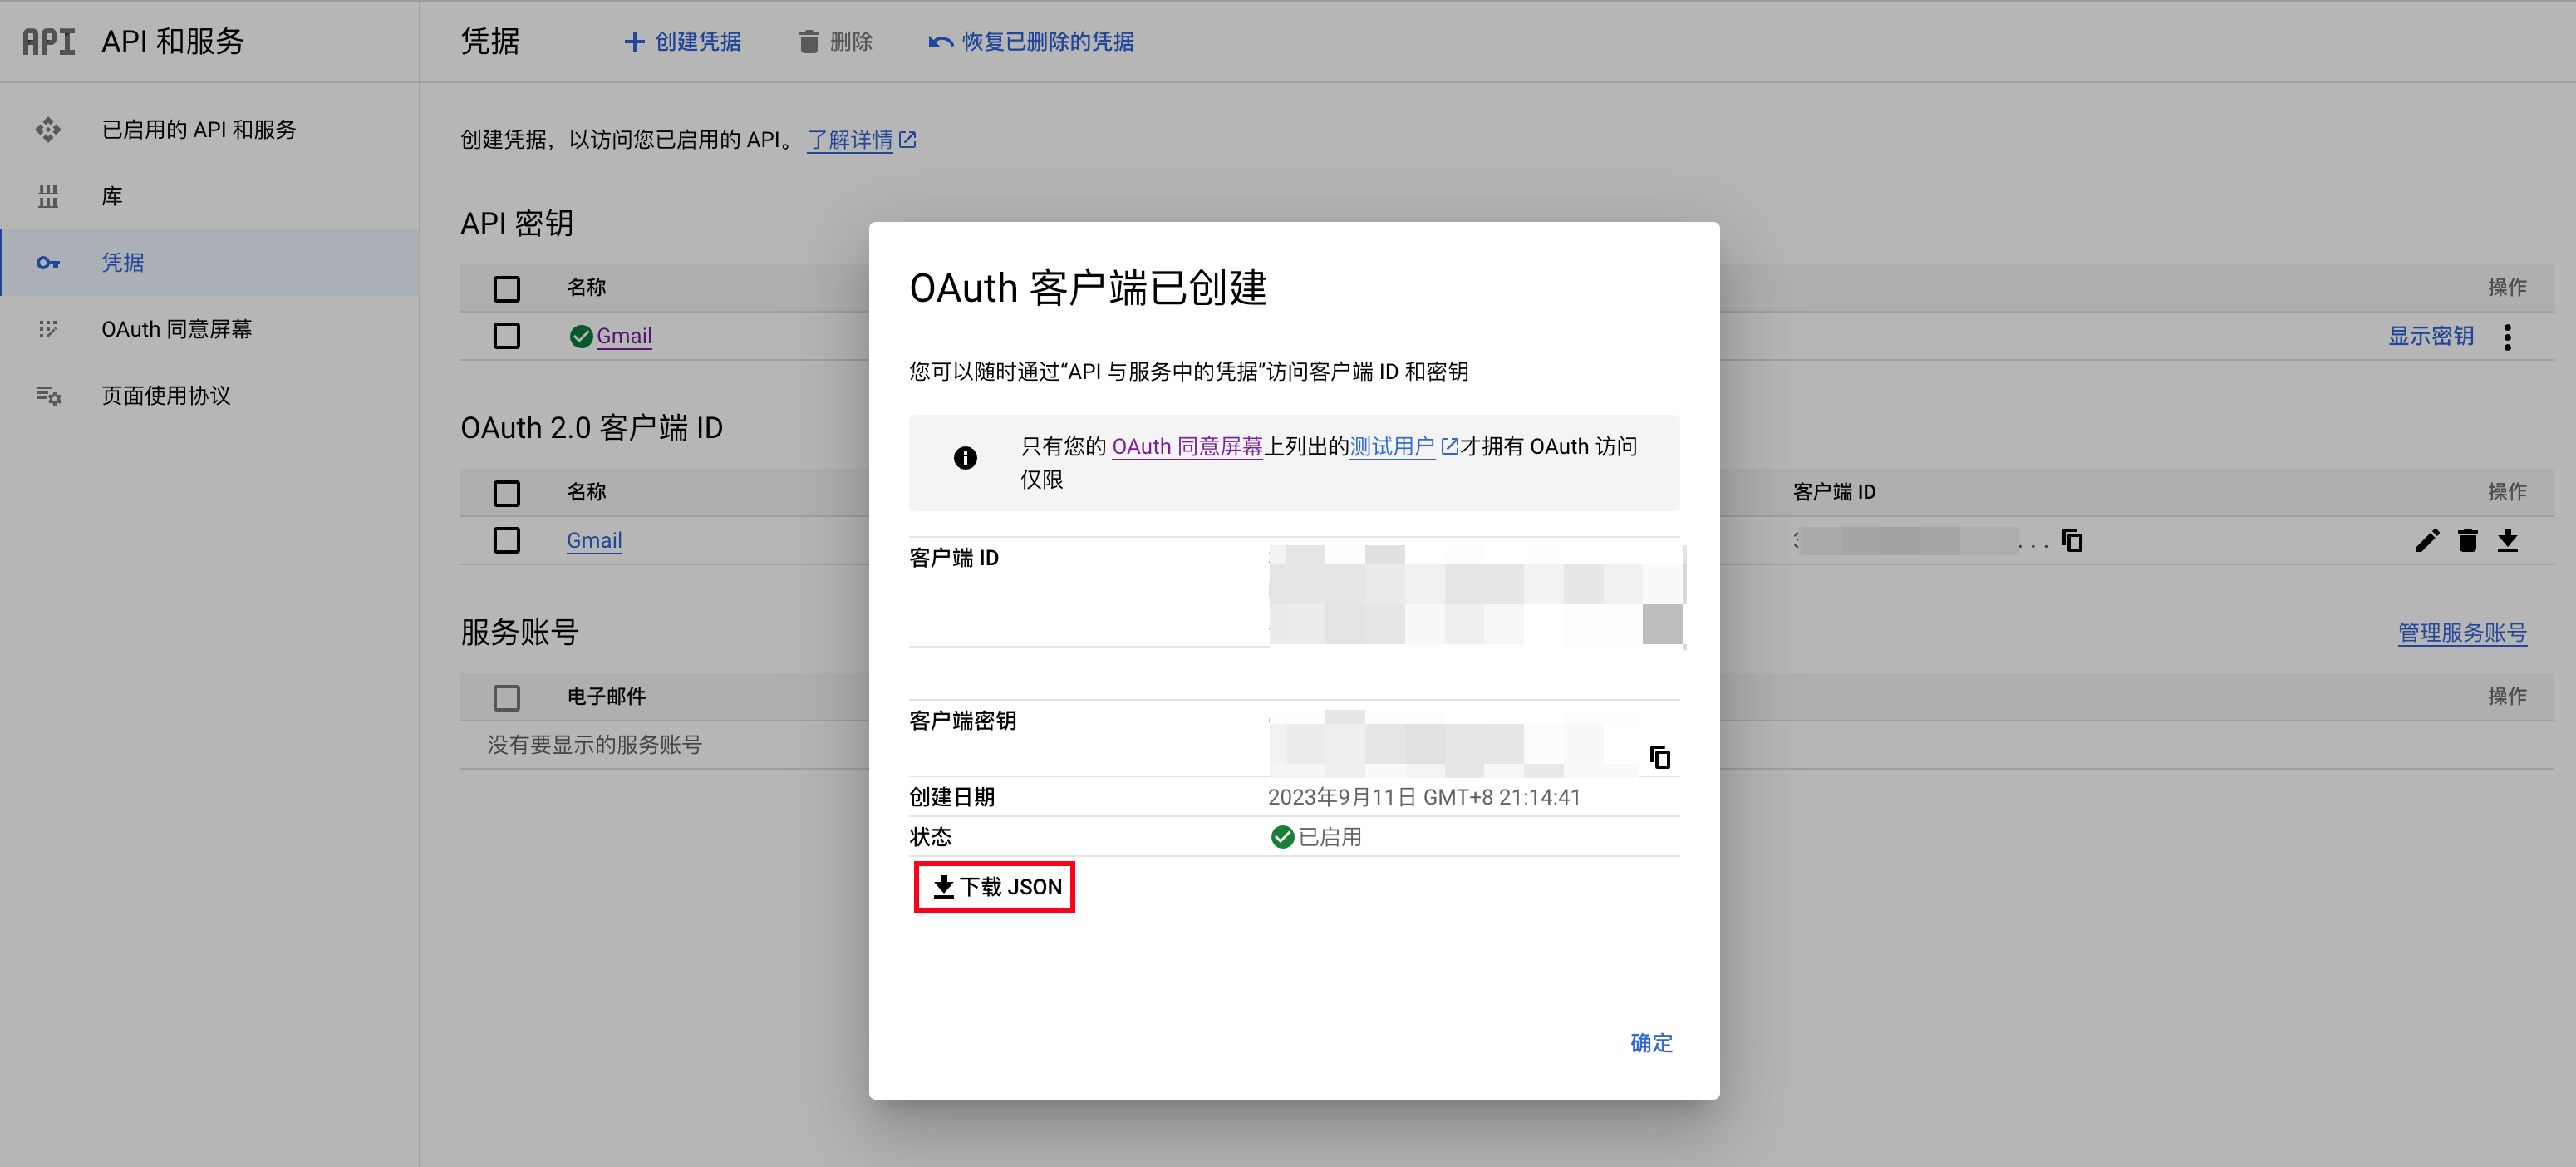
下载凭据 Json
这一切都完成后,谷歌会给你一个凭据表,这里我们点击“下载 JSON”,把文件保存到一个文件夹中。
创建邮件项目
本文的邮件项目的设计结构树为:
├── image-1.png # 邮件内图片
├── image-2.png
├── image-3.png
├── new-email.html # 邮件代码
├── pure.csv # 目标邮箱数据库
├── requirements.txt # 环境依赖
├── send.py # 核心脚本文件
├── token.json # 上文从谷歌云下载的授权文件
嘿嘿,看上去有点乱?主要分为邮件图片、邮件代码、核心代码、目标邮箱数据库。
邮件代码
邮件内的样式本质上都是 HTML 代码,最简单的办法就是你复制 Gmail 草稿,粘贴到转码工具,获取邮件源代码。
<div>Dear , This is Missy,, the promotion manager of makeup TikTok Shop your-company.</div> <div> </div> <div>I'm your fan of tiktok,We like your videos . Would you like you to make videos to promote our products?</div> <div>You can get our free samples as well as commission.</div> <div>Here is the product: 1.Mini Small Ice Cube Trays :</div> <div><a href="https://example.com" target="_blank">https://example.com</a></div> <div><img class="CToWUd a6T" src="cid:image-1.png" alt="Image 1" width="542" height="171" data-image-whitelisted="" data-bit="iit" /></div> <div> </div> <div>2.Ice Cube Tray:</div> <div><a href="https://example.com" target="_blank">https://example.com</a></div> <div><img class="CToWUd a6T" src="cid:image-2.png" alt="Image 2" width="542" height="181" data-image-whitelisted="" data-bit="iit" /></div> <div> <div> <div>3.Square ice tray:</div> <div><strong><a href="https://example.com" target="_blank">https://example.com</a></strong></div> </div> <div><img class="CToWUd a6T" src="cid:image-3.png" alt="Image 3" width="542" height="173" data-image-whitelisted="" data-bit="iit" /> <div class="yj6qo ajU"> <div id=":n6" class="ajR" data-tooltip="隱藏展開的郵件內容"><img class="ajT" src="https://ssl.gstatic.com/ui/v1/icons/mail/images/cleardot.gif" alt="" /></div> </div> <div class="adL"> </div> </div> <div class="adL"> </div> </div> <div class="adL"> <div class="adm"> </div> <div class="im"> <div> </div> <div><strong>Commission: You will get 15%-20% of the total value of the products you promote</strong></div> <div>Please let me know if you would like to promote my product,Hope to hear from you....</div> <div><strong>The last,</strong></div> <div><strong>Best regards</strong></div> </div> </div>
你可以在 VSCode 中通过插件渲染预览 HTML 代码内容。
核心 Python 代码
现在召唤出我们强大的 Python。不废话了,直接给出源代码:
import os
import pickle
from google_auth_oauthlib.flow import InstalledAppFlow
from google.auth.transport.requests import Request
from googleapiclient.discovery import build
import base64
from email.mime.multipart import MIMEMultipart
from email.mime.text import MIMEText
from email.mime.image import MIMEImage
from email.utils import formataddr
import csv


# 获取当前脚本的路径
current_path = os.path.dirname(os.path.abspath(__file__))

# 设置网络代理
os.environ['HTTP_PROXY'] = 'http://localhost:7890'
os.environ['HTTPS_PROXY'] = 'http://localhost:7890'

# OAuth 2.0 客户端 ID 和客户端密钥的文件路径
CLIENT_SECRET_FILE = 'token.json'
# Gmail API 的名称和版本
API_NAME = 'gmail'
API_VERSION = 'v1'
# Gmail API 的授权范围
SCOPES = ['https://mail.google.com/']

creds = None
# 如果有可用的 token.pickle 文件,就直接加载,不需要重新获取 OAuth2 的授权
if os.path.exists('token.pickle'):
    with open('token.pickle', 'rb') as token:
        creds = pickle.load(token)
# 如果没有可用的 Credentials,那就通过重新获取 OAuth2 的授权
if not creds or not creds.valid:
    if creds and creds.expired and creds.refresh_token:
        creds.refresh(Request())
    else:
        flow = InstalledAppFlow.from_client_secrets_file(CLIENT_SECRET_FILE, SCOPES)
        creds = flow.run_local_server(port=8080)
    # 保存获取到的 credentials,下次程序启动时可以直接加载
    with open('token.pickle', 'wb') as token:
        pickle.dump(creds, token)

# 创建 Gmail API 的 service 对象
service = build(API_NAME, API_VERSION, credentials=creds)

# 拼接 HTML 文件的路径
html_file_path = os.path.join(current_path, 'new-email.html')

# 读取 HTML 文件内容
with open(html_file_path, 'r') as file:
    html_content = file.read()

# 读取目标邮箱列表
target_emails = []
csv_file_path = os.path.join(current_path, 'pure.csv')
print("CSV 文件路径:", csv_file_path)

with open(csv_file_path, 'r') as csvfile:
    reader = csv.DictReader(csvfile)
    print(reader.fieldnames)
    for row in reader:
        target_email = row['Target']
        target_emails.append(target_email)
        print(target_emails)

# 发送邮件给每个目标邮箱
for target_email in target_emails:

    # 创建邮件内容
    msg = MIMEMultipart()
    msg['to'] = target_email  # 修改这里
    msg['from'] = formataddr(("发件人姓名", "发件邮箱"))
    msg['subject'] = "邮箱标题"

    # 读取图片文件并创建图片附件
    image_files = ['image-1.png', 'image-2.png', 'image-3.png']
    for image_file in image_files:
        image_path = os.path.join(current_path, image_file)
        with open(image_path, 'rb') as file:
            image_data = file.read()
        image_attachment = MIMEImage(image_data)
        image_attachment.add_header('Content-Disposition', 'attachment', filename=image_file)
        image_attachment.add_header('Content-ID', f'<{image_file}>')  # 添加 Content-ID 头部
        msg.attach(image_attachment)

    # 将 HTML 内容转换为 MIMEText 对象并添加到邮件中
    html_part = MIMEText(html_content, 'html')
    msg.attach(html_part)

    # 将邮件内容编码为 base64url
    raw_message = base64.urlsafe_b64encode(msg.as_bytes())
    raw_message = raw_message.decode()

    # 创建一个可以通过 Gmail API 发送的邮件对象
    message = service.users().messages().send(userId="me", body={"raw": raw_message})

    # 发送邮件
    try:
        message.execute()
    except HttpError as error:
        print(f'An error occurred: {error}')

# 更新 CSV 文件中的 Status 列为 Done

csv_file_path = os.path.join(current_path, 'pure.csv')

fieldnames = ['Target', 'Status']


with open(csv_file_path, 'r') as csvfile:
    reader = csv.DictReader(csvfile)
    rows = list(reader)

for row in rows:
    row['Status'] = 'Done'

with open(csv_file_path, 'w', newline='') as csvfile:
    writer = csv.DictWriter(csvfile, fieldnames=fieldnames)
    writer.writeheader()
    writer.writerows(rows)
依赖环境:
要想成功让这个代码跑起来,还得安装以下依赖:
# 清华源
-i https://pypi.tuna.tsinghua.edu.cn/simple

# 安装所需的库
google_auth_oauthlib
google-auth
google-api-python-client

# 安装命令 pip install -r requirements.txt
目标邮件库格式
Target,Status
[email protected],
[email protected],
[email protected],
运行代码
运行代码后,会自动弹出浏览器,选择你的谷歌账号。
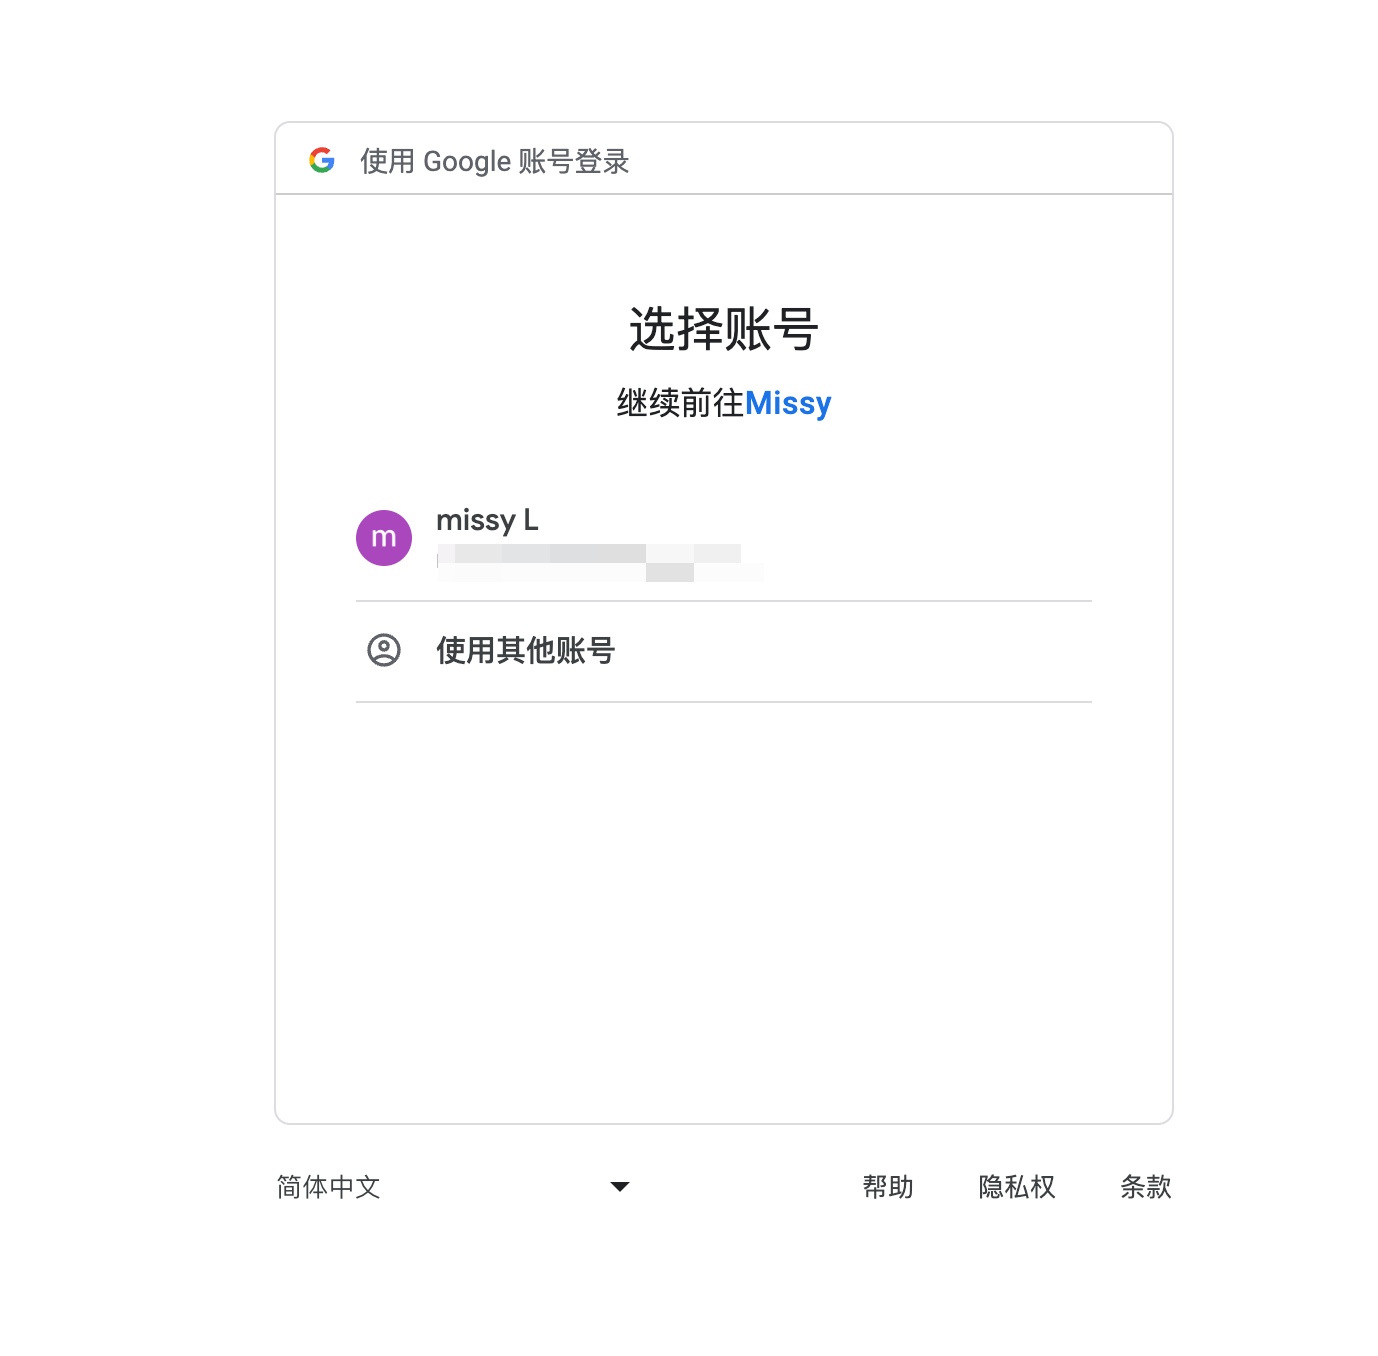
然后接下来就是无脑登录和授权。如果没有什么意外的话程序就可以按照你给的邮箱地址逐个发送邮件了。最好先把目标邮箱地址换成自己的,先测试邮件的样式是否符合预期,没有问题后再换成客户的邮箱。